En Vacaciones

Although I take photos for a living, I still enjoy taking holiday pics. There is always the expectation of finding a new way to capture a much-photographed location: whether it’s just because you have a fresh, unique eye for something (?) or just because you get lucky with something unique occurring when you happen to be in location.

Valencia was a mix of both: the last weekend of the Fellas (a mad festival of sculpture, parades and very loud firecrackers); and these very modern buildings waiting (begging) to be photographed.

The Fellas is pretty hard to capture and like a lot of things you need to be in amongst everything and I was on holiday, I did capture some of the artwork. The trick here is to find a different view of things (and try to exclude a much of the clutter as possible).

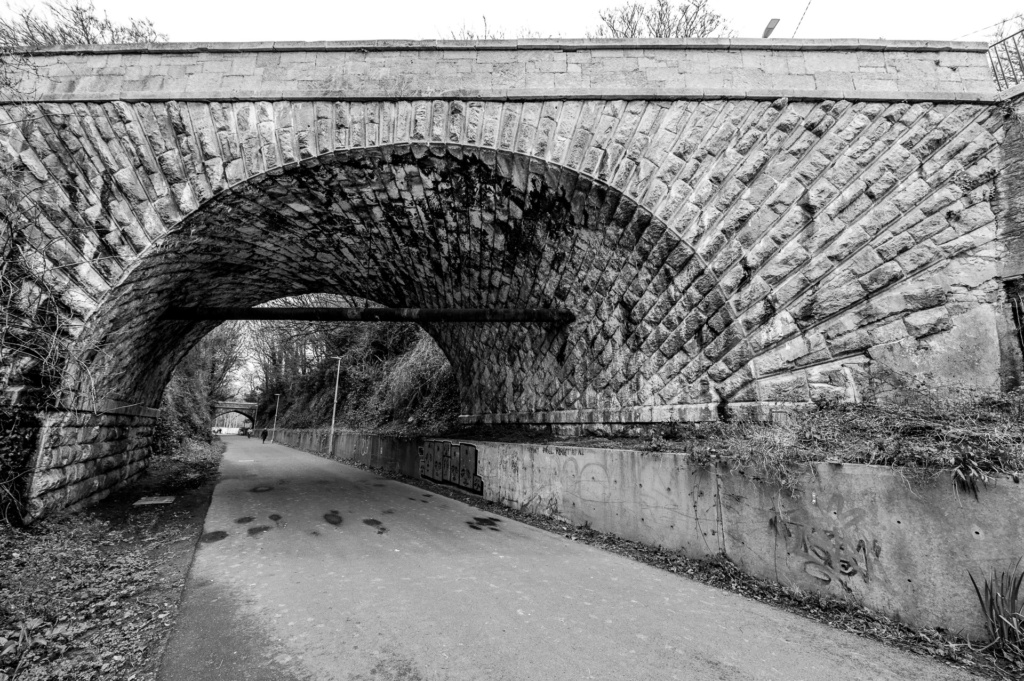
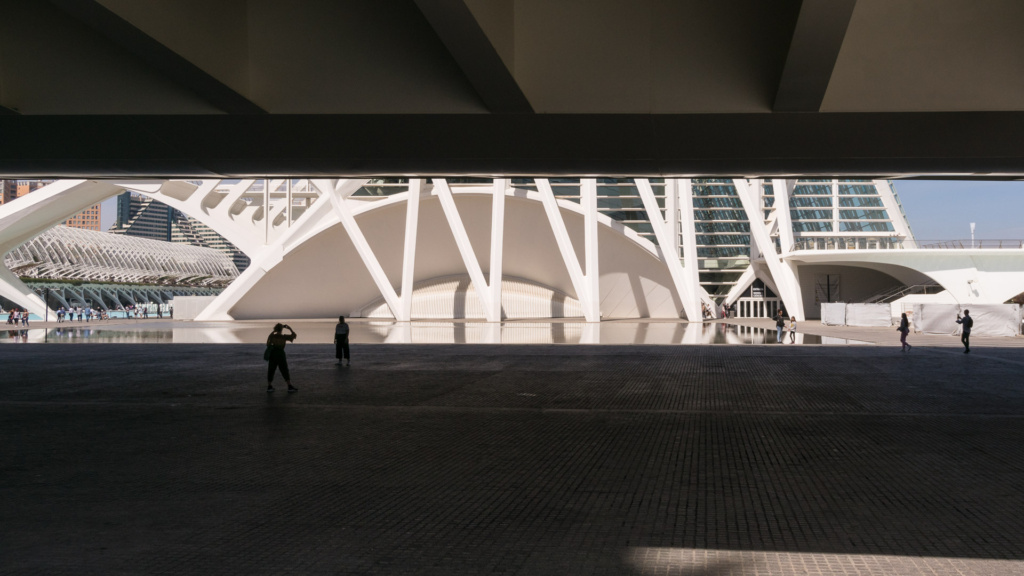
I do have a grá for slightly abstract photos of modern buildings (especially with nice blue skies) – and especially in black and white. It goes way back to shooting the Grandstand in Epsom with black and white film and a polariod + red filter combo to make the sky go black.

And although I’m sure these buildings have been shot a million times, and maybe in better conditions and with more time (much fewer people for a start!), I did have fun.

Looking around at what other people were doing, there are a few teaching points:

  • I used a wider angle lens (on the Nikon 1). This exaggerated and emphasized some of angles and perspectives of the buildings.
  • I didn’t always try to eliminate the people – they are part of the landscape in a busy tourist attraction like this.
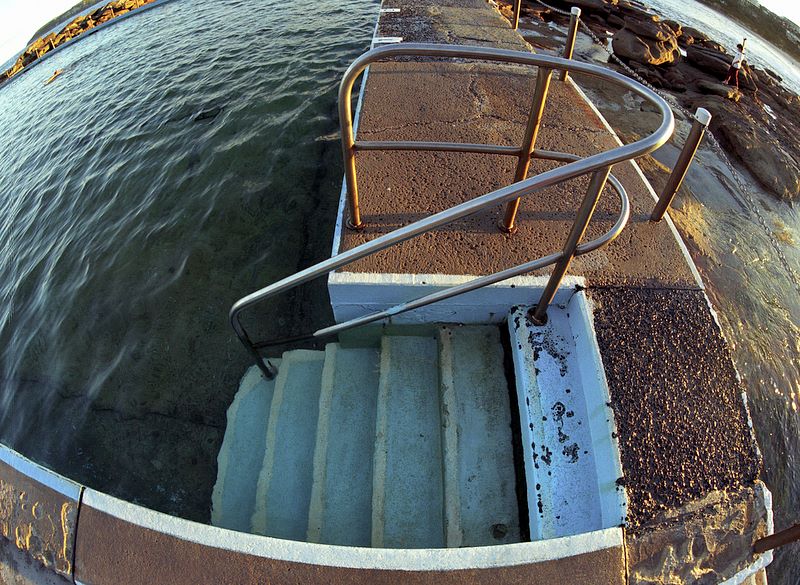
  • Look up, squat down
  • Look for abstract details: shapes, colours and structure. Isolate them (I also had a longer lens with me)
  • Think about contrast – and possible options for black and white images with high contrast.
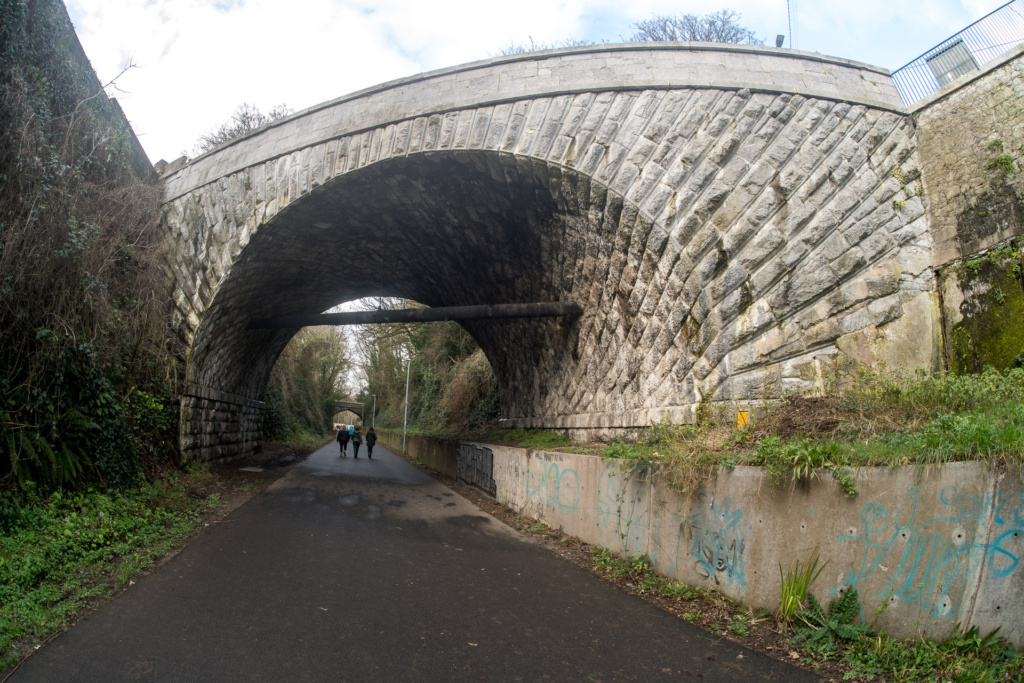
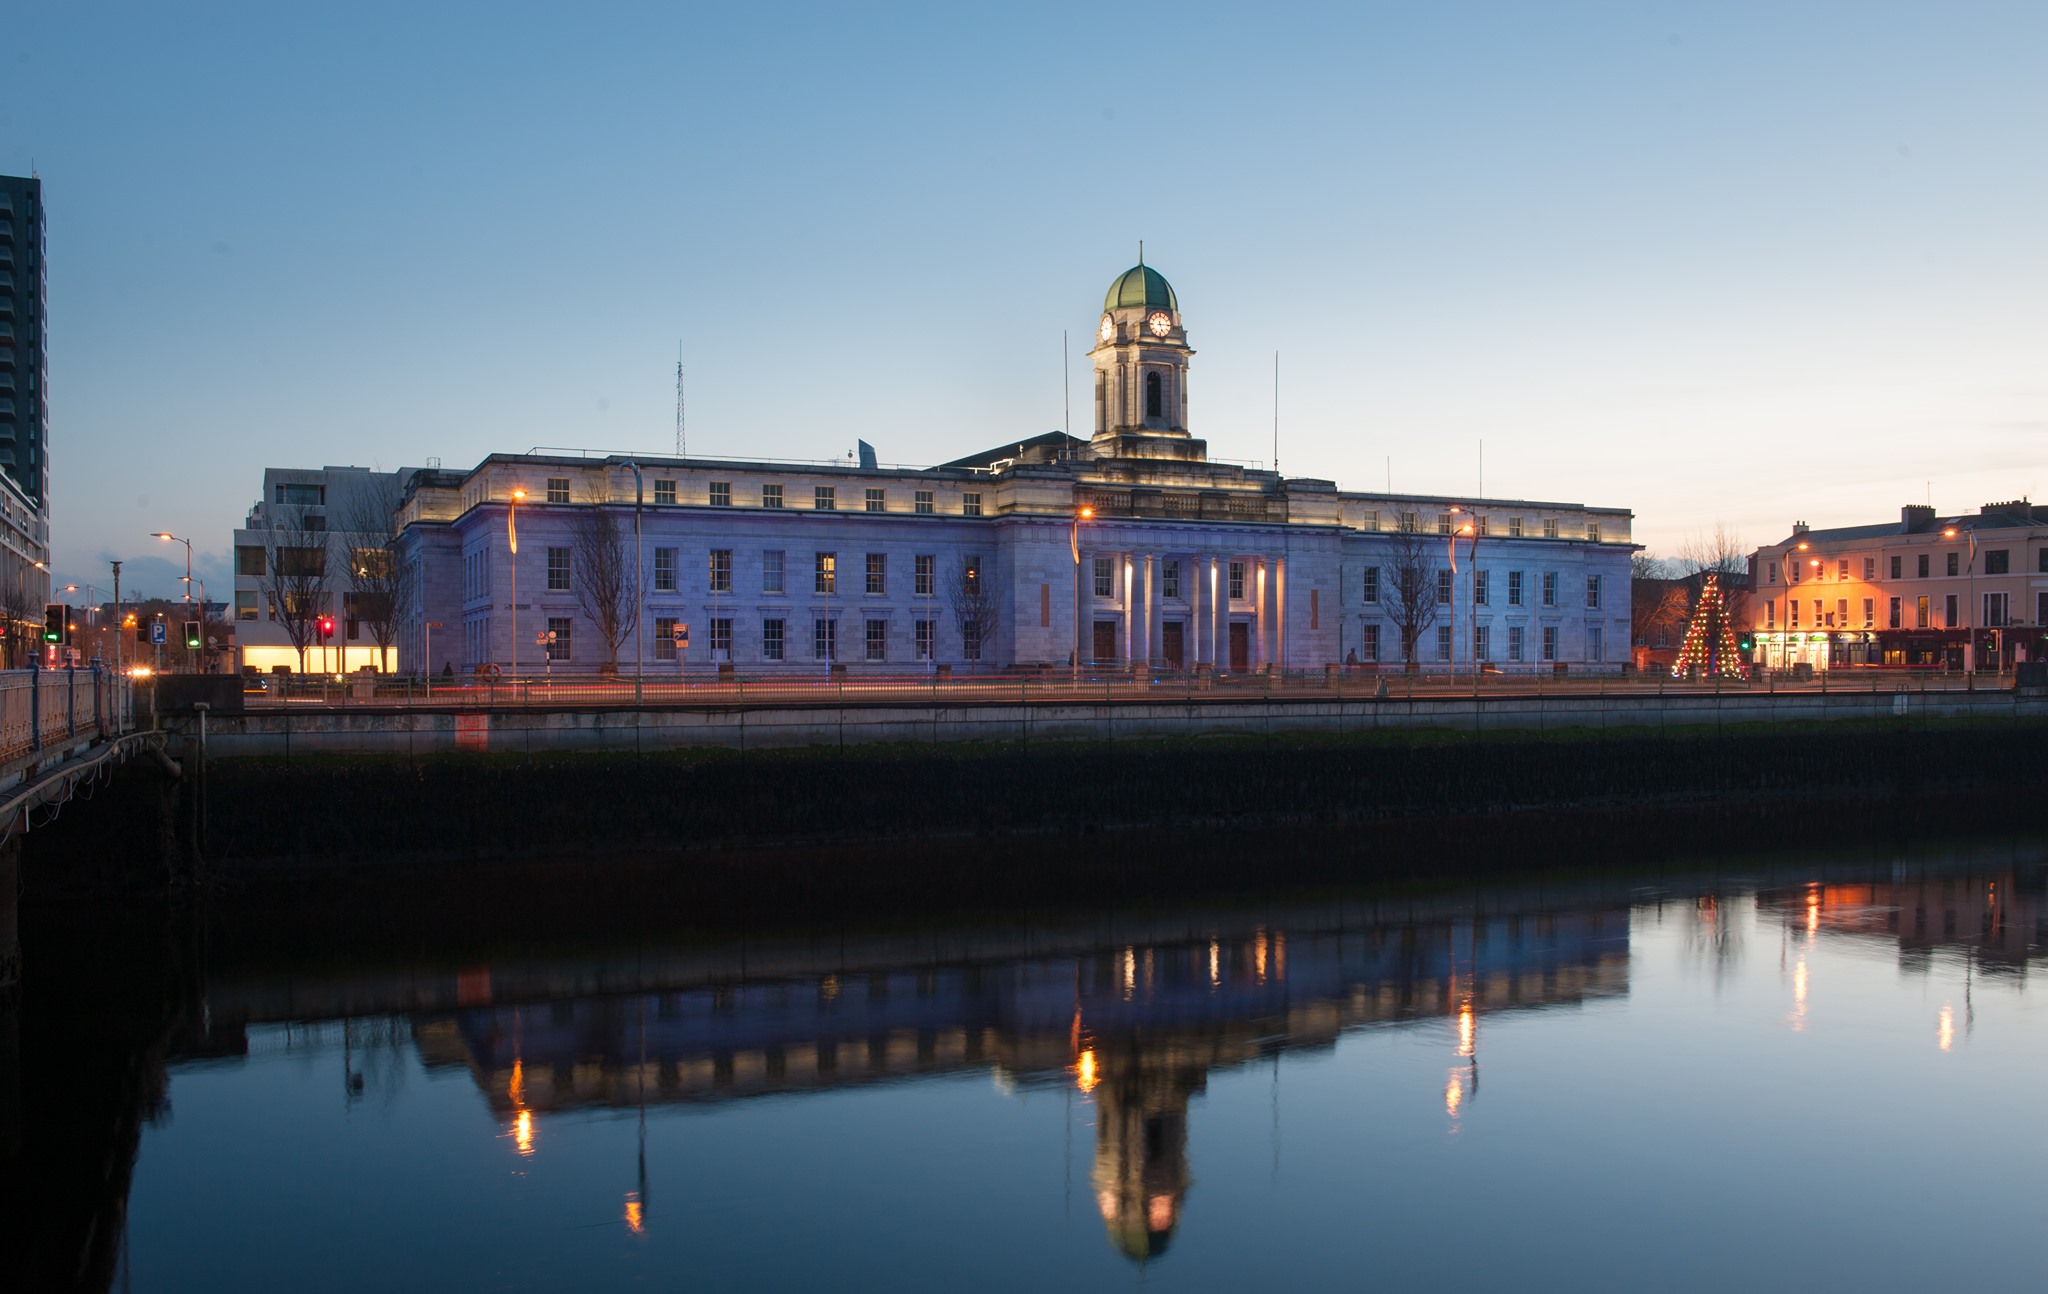
  • MOST OF ALL: keep your eyes and mind open. I particularly like this letter-box photo viewing between the bridge shadows and rather than waiting for the people to clear out I like the people in there as silhouettes (especially the two taking photos). Also I think I as the only one to spot the reflection in the water in front of the building at the side. The other water features may be been intended as reflection pools but it was too breezy that day apart from around the side.

Anyway, here’s the edited highlights:

Old Fish

The New Year brings a time to generally sort things out. I’ve fixed up the web site a bit so it’s all WordPress now and works better on mobile devices (still more to do on the content). It’s also the time of year when I think I need to do more personal work. Previous projects include Shooting Nana which in time has become something that I’m very happy I took the time to do.

So far this year I haven’t come up with anything significant for a personal project but the urge to take some more photos has had me outside with some unusual and unused combinations of cameras and lenses. Just to try out, maybe learn something, add a few strings to my bow.

I’ve always been a fan of the Fisheye lens. I have an old 16mm f3.5 manual lens from the early 70s and it’s served me well when the fad has taken me over the years.

So I put it on my usual work camera (the D850) and took it for a spin on Sunday. The results were … underwhelming. I loved this lens. I love the weird and simplistic point of view. But it looks kinda dull on the D850. I’m not sure if it’s picked up some fungus or the newer, higher resolution sensor is just showing it up for what it is or maybe the subject and lighting just didn’t suit it.

Railway Bridge Fisheye. The intention was to show the unusual construction of this bridge over the old railway: the way that the stones are laid radially with the arch and then slope into the arch underside

More testing required and it may be time to look for a more modern replacement – even though I don’t use it that much (and hardly at all professionally). There are a few new Fisheye being made for the mirrorless cameras that look interesting.

So I went back today with the rectilinear wide-angle. These are more complex (and expensive) wideangle lenses which try to correct for the natural distortion that a simple lens like the fisheye creates.

Again the aim here is to try and bring out the unusual structure of the bridge by using the extreme wide angle to exaggerate the geometry.

Railway Bridge at 14mm, fully corrected. The wide angle gets you in to the arch and shows up the shape while the rectilinear lens hold the horizontal lines as straight as possible. The black and white conversion brings your attention to the geometry of the stone work.

Hopefully it’s easy to see the different characteristics of these two lenses. Although the are very similar focal lengths, their rendering is quite different. The Nikon 14-24f2.8 has done a far better job of rendering the details and contrast of the image (in fact this was taken on the Z6 as an experiment and to take advantage of the maximum dynamic range).

I still like the Fisheye. I might put it back on the D700 and do some more testing before replacing my 16mm f3.5 AI-converted lens (which is nearly as old as I am!)

Freshwater Steps. The glory days of the 16f3.5 fisheye: paired with the Nikon F4e

Updated Photography Course

My Beginners Photography Course is running again as part of the Ashton Adult Education Programme.

This term we’ve extended each class to a full 2 hours to allow more hands-on practical work.   There will be more time on practice and I’m also offering the chance to do a practical workshop outside the course.

Otherwise the course structure is the same – spread over 8 weeks and it covers a wide range of image-making with whatever camera you’re have available to use.

More info and sign up at https://ashton.ie/adult-education/

Upgrade Ingredient List

So here’s what it took to upgrade my working camera system (in chronological order):

  • Computer: A new camera will produce larger files.  To move all that extra data around effectively I needed more processing power and more memory.  Otherwise there’s going to be a lot of waiting around.  Now this was actually forced on me with my old one dying but in fact doing this first makes a lot of sense so you’re ready for the files when the new camera comes.
  • Lightroom Upgrade.  I was getting by with an older version with one-off purchase.  I need an upgrade for a newer camera RAW files.
  • New Main Body – obviously. I chose a Nikon D850.  Second hand from a large dealer in the UK.  Reasonably low shutter actuations and 12 month warranty.
  • XQD and SD cards.  New camera takes different cards.  And bigger, faster cards to manage those larger files.
  • XQD card reader.  I prefer to download cards from a reader rather than connecting the camera to the PC every time.
  • Spare cards.  So having got one to start off with, I shopped around for spare cards.  With the costs of the XQD cards I’m only carrying limited spares.  With the D700 I had a bank of CFs available.
  • Screen protector for the LCD.  I use the thin ground glass, stick-on ones.
  • Spare Battery.  I bought a third party spare which came with a USB charger which allows me to charge at home and at work as a bonus.
  • L-Bracket for the tripod.  The ability to mount the camera vertically on the Tripod is really useful.  L-Brackets are fitted to each body so you need a new one for a new body.
  • Upgrade my 50mm. So this was always my weakest lens (although not a bad one) and the higher resolution and faster focusing of the new camera has shown it up to the point where I can justify the upgrade.  The others look good for now but the 50 needed to be changed.  Again, take advantage of a good second hand market across the EU.  Lots of people buy these lenses and end up not using them much (unless they take portraits professionally).
  • Battery / Vertical Grip.  I used the vertical grip the whole time on the D700 but I am enjoying the reduction in weight not using it on the D850.  I rarely needed the extra battery.  So I wasn’t going to bother.  But for jobs when I’m shooting a lot of head shots the vertical grip is useful.  Then I got a deal on a third party grip in the US so I got it just for those jobs where it helps, rather than to be permanently attached.
  • File Backup / Archive.  Those larger files are now eating disc space as well.  I Archive all the original RAW files as well as maintaining an archive of the finished client files.  I made some changes to the way that works to make it more cost effective per GB and bought more disc space.
  • Backup / Second body upgrade.  Initially I just used the D700 but it’s very different to the D850 (and uses different cards and batteries).  As I get more used to the new camera, the D700 is a less effectively back-up / second camera.  Ideally you’d buy an identical body as backup but that’s a lot of cash.  In the end I bought a D500 second hand.  Same cards, same charger, very similar functional layout, same focusing system.  Crop sensor!
  • More cards.  My two bodies now use the same cards and batteries so I need another spare.
  • Another screen protector for the D500.

I think that’s it.  For now!

Do I need a couple of DX lenses (including a standard zoom) for the D500?  Maybe but I’m not yet convinced.  I have an old 17-70 DX which will do and the 17-35f2.8 sits quite well on it too – for the uses I have for it.

Otherwise my existing lenses cover me and are all good.  Most have a replacement which is ‘better’ but also is going to cost me considerably to upgrade – even if I sell the old one – and realistically the benefits are pretty marginal.  The most obvious is my 85f1.4D which is a little battered and not optimised for modern high res digital but it’s not a main lens (I use the 105f2.8 a lot).

See Me

More product photos in the office today.  They can be tricky: balancing out white / shiny / transparent materials on a 255-white background.

As usual, the trick is to get  as much done in-camera and not rely too much on post production for whiting out the background, controlling / eliminating shadows etc.

But sometimes there just isn’t anywhere to hide – especially when you’re photographing curved shiny things.

In the surface of this bottle top, you have: my main light, the pack which is alongside it and all of the office around the other side.  Now I screened off most of the office junk with some black card but in post I noticed this weird reflection.

On closer inspection: it’s ME!!! – my shirt and my hand on the shutter release.

Now I could go back and reshoot with the cable release or the self timer but I think in this case photoshop will do.

Although part of me wants to be immortalised with the product.

Tech or Technique

The last couple of years we’ve had these guys nesting in the roof (no idea what they are!).  For the last three weeks the parents have been diligently supplying food to their brood, at times coming every 2-3 minutes to the nest at high speed, banking late and popping into the hole between the gutter and the roof.

It’s amazing to watch.  And it happens so fast it’s very hard to photograph.

But could my fancy new camera with it’s super new auto-focus 3D tracking system handle it.  Would I be able to work it sufficiently well to make it work.  Well worth a try.

Indeed, sometimes they come down the length of the garden, so you get a good look at them coming.  It should be possible to pick one up and track it into the nest and fire the shutter when it starts to bank.  How hard can that be?

Impossible.  When you actually watch them, they don’t come straight in very often.  And the vantage point from the bedroom window doesn’t give you direct line of sight down that flight path anyway.

So forget the tech, experience and technique are going to make this happen.  Time to start turning off:

Trap Focus.

The AF isn’t going to pick them up early enough to track them.  Or at least, I’m not able to get it to and then zoom and hold the frame.  But their destination is fixed so I know where they will be when they finally open their wings to bank just before entering the nest – within a certain degree.

So I can manually set up a zone of focus just beyond the nest, reaching back as far as I can and take the shot as the bird enters that zone.  That’s called trap focus.

So higher F-stop the more depth to the zone.  But it turns out the birds are moving really fast and I need at least 1/1000th of a second of shutter speed to stop the wing movement.  So compromise is needed – and a boost to the ISO to make that happen even though it’s broad daylight.

Manual Exposure

I’ve set pretty tight constraints on the exposure now – I need as much depth of field as possible and I need a high shutter speed.  And I have a dark bird against an open sky.

So I’m not going to take any chances of the camera not noticing the bird and making the wrong choices.  Fix everything with manual exposure and ISO.  Keep an eye on the lighting in case it changes (sun coming out or denser cloud) but otherwise manual will do

Tripod

There’s a lot of waiting around here.  They are busy but sometimes they do disappear for 5 minutes foraging then come back unexpectedly.  This is the 70-200mm lens and it’s getting heavy.  But again, they are coming back to a fixed position – albeit from different directions.  So stick everything on the tripod and use the cable release to just sit any wait for a bird to come into the frame.

Crop

Having fixed the frame, I need some latitude of error so I can catch a bird no matter where it appears from (they don’t just come up the garden but from both sides and behind sometimes).  So widen the frame a bit to give me some margin of error.

Now this is where my new tech finally buys me something: all that resolution means I can crop heavily and still get a decent image.

In fact, I realise that if I set the camera to DX Crop Mode, I still have a handy 20MP but I can now zoom back a little and use shorter focal length (105 instead of 200mm)- and buy myself some more depth of field.

That seems to work well – now it’s the same thing as just pulling back and cropping the larger image but it also saves me some image size.

Timing

Just like good comedy, wildlife photography is about timing.

So now I have everything tied down: when a bird enters the frame in the zone of focus it will get focused, frozen in time and correctly exposed.  I just need the bird in the frame doing something interesting.

That takes patience and time and patience and a bit of practice to get the timing of the exposure right.

Just sit and click…

Can you make me look younger?

Of course I can, but are you sure that’s what you want?

None of us are as young as we used to be and it’s pretty common for someone getting a Professional Headshot taken to say something off-the-cuff about photoshop when we start the shoot.

That’s a pretty normal, self-concious reaction to being put under the lights.

But some people are serious: they want me to make them look younger.

Of course with Photoshop, anything is possible. But remember that a Profile Image is all about establishing trust. With age comes experience, wisdom and pragmatism. All good things for a professional in a service industry.

Also remember that at some stage, if you get your marketing right, this potential client is going to meet you in the flesh. If they discover they’ve been mislead by your profile image, how much more will they trust you?

Most of the work on an image is done in camera: lighting, posture, presentation, expression and engagement. I do just enough finishing in photoshop to make sure you look ‘your best’.

via GIPHY

More of Me

Some nice reaction to my last self-portrait post.

Now it’s Friday again and I’m messing with the studio set-up to give some more options for Business Headshots.  There’s a lot of them about at the moment.

So out with the Clamshell lighting.  A simple but effective beauty lighting: one light and a shiney reflector (in this case the triflector and stand).

And what Beauty is on hand to try it out?  Well just me actually.

Last time someone asked that I smiled a bit.  Trying to pull a natural smile on your own in a dark room isn’t easy but I tried.

Only that lovely clamshell lighting picked up all those wrinkles – I look like a pug!  Time for some delicate photoshop!!!

201701-Collage copy

One of these might actually work for a new profile image?  Text your votes now!

For the interested, I also tested out the tethered set-up for another job on next week.   This allowed me to trigger the camera remotely with the wireless mouse and review the images in Lightroom without leaving my seat.  I just had to trust the autofocus – which did a very good job at f2 on the 85mmf1.4.  You may also spot that I added a small backlight so I have a slightly better edge to my hairline in the later photos (click the image for the higher res version).  I just the Lowel video light but it’s hard to direct on your own.  The background is a dark pop-up but it’s getting no light so it’s gone practically black.  Liking the Black more and more…

Incentives (Draft 2)

I knew this would be a difficult subject to address.  Draft 1 kinda turned into a rant so it’s consigned to the WordPress ‘permanent draft’ folder.

So let’s start again.

My objective for all my family photo sessions is that everyone enjoys it.  It’s simple really: if we can make sure that the whole experience is a very positive one then the photos will reflect that.  As much as possible is done to make that happen – choosing a good location, timing etc – and from the moment we meet it should be obvious that this isn’t something that anyone needs to get stressed about: we’re just going to go out into the Park and take some photos.

I find that kids react to their environment.  If everyone is cool and easy-going they’ll relax and be themselves.  They’ll start playing and I’ll be able to watch them, encourage them, they’ll start to trust me and take some really lovely pictures of them.

It’s easy to go in to a photo session with expectations of how it’ll be.  In reality you might not have done this before. I think some parents worry that they might not get the images they expect.  Remember that all my work is shot with ‘normal’ people.  The pics on the web site are kids just like yours.

I’ve done this before.  You’re in good hands. I understand that kids need some time to get used to me, the camera and having their photos taken.  They need time to feel comfortable, reassurance that they’re not going to get into trouble for doing or not doing something so they can relax and play.

So don’t panic.  Relax and enjoy your kids and let me handle the photos. Don’t ask the kids to ‘smile’ or ‘be good’ because those terms mean nothing in the context of the photo session.

It’s not uncommon before or during a session for some parents to get so worried that their kids won’t ‘smile’ or ‘be good’ that they offer a reward for doing just that.  I have found that overall that’s not helpful – mostly because it’s too easy to get wrong.  Kids can become so focussed on the reward that it upsets the session.

Equally they can be so unmoved by the reward that they are impervious to it’s charms and parents are tempted to escalate the incentive (or even turn to punishments).  In this case we’re now fighting and the chance of pictures of a relaxed kid smiling are reduced.

I’ll try to illustrate:

Dad: Now you be good for the man
Kid: ????
Dad: Smile now
Kid pulls weird grin
Dad: Not that smile, your real smile
Kids weird grin just gets weirder
Dad: If you give me a big, real smile I’ll give you a treat
Kid just tries harder at the really big weird grin
Dad: No, that’s not it
Kid is now upset because they failed and won’t get the treat
Dad: Just smile for Daddy
A cycle of weird grins, Dad gets frusrated, Kids gets sadder cos Dad’s not happy. Eventually Dad notices Kid is sad and gives the treat to make it better.  Kid thinks he did good and it’s all over.  Until:

Dad: so where’s my smile?
Round we go again – Kid not sure what he did last time for the treat so goes through grinning-crying routine again.

But we still don’t have a photo.

Now these are hypothetical.  In reality, most Dads are Messers at heart (for their own kids at least) and when they realise they you’re giving them the best excuse ever to just kick back and enjoy their family we get what we came for.

So, in summary:

  1. Relax
  2. Treat the session as just a normal thing to do
  3. Don’t offer incentives or negative repercussions for behaviour
  4. You can reward once we’re done but don’t mention it during the session
  5. If your kids aren’t smiling then say or do something that will make them smile or laugh (just make sure I’m ready to photograph the reaction)
  6. Follow my lead for helping me get a good reaction from them

Preparing for your Family Photo Session

So we’ve booked the session, decided where to go and now you’re wondering what you need to do before we meet for the photo session.

I’ll contact you shortly before the session to confirm the booking.  I’d normally leave that until a day or so before the actual session so we can get a more reliable look at the weather forecast in case there’s anything nasty definitely headed our way.  All being well you’ll get a text or a call from me to confirm time and place (but if at anytime you want to check, just give me a buzz).

Similarly if someone’s sick or something else comes up just call me and we can re-schedule the session.  I want to get the best images and that’s not going to happen if someone – especially a young child – is suffering with something.

Clothing

RLR_4524
Lots of girls want to choose their own clothes – it’s part of who they are

The most common question I get asked about is clothing.  There’s no absolute rules here but there are a few things to bare in mind:

  • Everyone needs to be comfortable and free to play.  So warm but not too snugged up, layers they can take off if they’re hot and something handy to put on if it gets cold.
  • Cute hats are generally good – especially if they’re used to them – but try to avoid anything that will hide their faces in the pictures: hats with a brim, scalves, body warmers with high necks etc.
  • Nothing too precious.  They need to be able to play freely without you or them worrying about getting a bit dirty.
  • While the ‘white shirt / t-shirt’ image is popular in the US, it can be quite hard on most Irish kids’ complexions – especially at this time of year.  It’s also going to be the first thing to show dirt (and it may be too cool in Autumn as well).
  • In general remember that we’re here to get pictures of you all and your faces are what we’re most interested in.  So avoid anything that’s going to compete with your expressions visually: heavily branded clothes, tops with characters on them (especially faces), very distracting patterns etc.
  • Brightly coloured clothing can work well in the forest but make sure it’s not too much (or clashing).  Again, the problem comes when the colours take away from the kids expressions.


Body warmer are handy but watch out for high necks that will hide their chins
Body warmers are handy but watch out for high necks that will hide their chins

For most people the session is about the whole family but there are parents who don’t want to come into the photos.  That’s a bit of shame but it’s OK.  Even so you might be asked to support your children getting up onto a tree or something or just holding their hand at some point so even if you don’t want to do a full family photo, make sure that you’re wearing something you don’t mind being photographed in (even if it’s your back or your arm).

RLQ_5506
Mom and Dad need to get in on the act too!

Incentives

This is generally not something you think about before the session but getting this wrong in the middle of the day can make things harder than perhaps they need to be.  It’s often occurred to me that I should have talked to parents about incentives before the session because they have an significant impact on childrens’ behaviour (for good or for bad).

There’s actually quite a lot of psycology in taking pictures.  Offering a reward for ‘good behaviour’ with small kids can be hard to get right (and easy to get wrong).  It tends to work once or twice for a short period and you never quite plan for what happens next.

In fact, this is a big subject and I’m going to need a separate post but suffice it to say here that you should think more about positive re-enforcements (“how nice this is going to be”) and distractions (“what’s over there?”) than offering a reward for ‘being good’.  I’ll be doing my best to make the whole session fun and hopefully they’ll be happy and playful without the promise of a reward.

Food

You know your own kids.  If they don’t eat between meals, they’ll be fine.  If they snack then yes, bring food. Something small, clean, easy / quick to eat and not too sugary.  Bite-sized snacks that aren’t rewards are ideal.